Installing a new built-in induction cooktop can seem like a complex home improvement project, but with the right guidance, tools, and careful attention to detail, it’s a task many homeowners can confidently tackle. Upgrading to an induction cooktop offers numerous benefits, from faster cooking times and precise temperature control to enhanced energy efficiency and a sleek kitchen aesthetic. This comprehensive guide will walk you through every step of the installation process, ensuring you have the knowledge to successfully integrate this modern appliance into your home.
What is an Induction Cooktop?
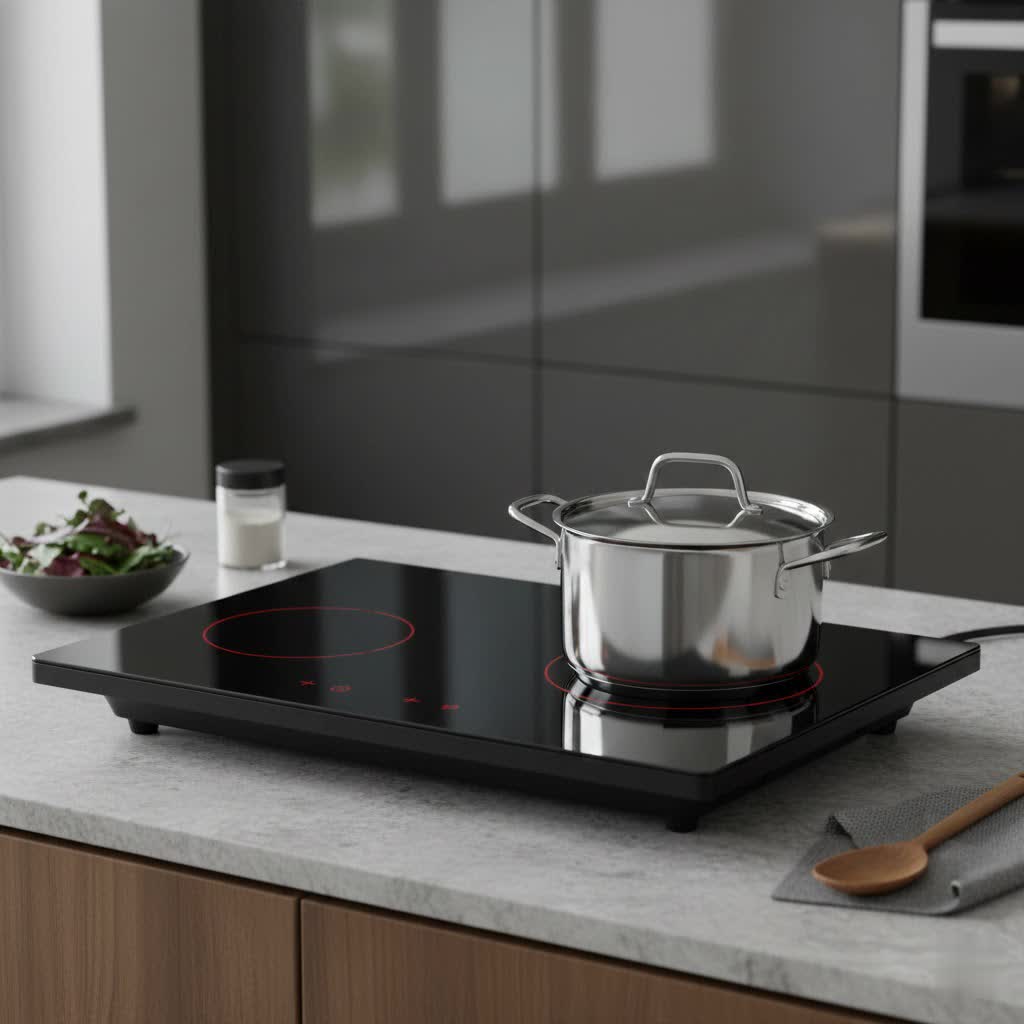
An induction cooktop is a cutting-edge kitchen appliance that utilizes electromagnetic fields to heat cookware directly, rather than relying on a flame or a radiant heating element. This innovative technology ensures rapid heating and remarkable energy efficiency, as heat is generated within the pot or pan itself. Understanding its core principles is the first step toward appreciating its benefits and ensuring a proper installation.
How Induction Cooktops Work
|
Our Picks for the Best Induction cooktop in 2026
As an Amazon Associate I earn from qualifying purchases.
|
||
| Num | Product | Action |
|---|---|---|
| 1 | ChangBERT Portable Induction Cooktop Enhanced Version, One-Click Max Power 1800W Large Heating Coil Burner, Precise Temperature Control, NSF Certified Commercial Grade Low Noise Hot Plate |

|
| 2 | Amazon Basics 1800W Portable Electric Induction Cooktop, Burner and Child Lock, Overheat Protection, Timer, 8 Power Settings, Temperature Control Up to 440°F, for Cookware Diameter 5.7"-8.2", Black |
|
| 3 | Nuwave Flex Precision Induction Cooktop, 10.25” Shatter-Proof Ceramic Glass, 6.5” Heating Coil, 45 Temps from 100°F to 500°F, 3 Wattage Settings 600, 900 & 1300 Watts, Black |
|
| 4 | Empava Portable Induction Hot Plate Cooktop, Single 1 Burner Countertop Cooker, 3 Preset Modes, Shatter-proof Flat Glass Top, 110~120 Volt Plug in Electric Stove for Kitchen, Outdoor Camping, RV |
|
| 5 | Duxtop Portable Induction Cooktop, Countertop Burner Induction Hot Plate with LCD Sensor Touch 1800 Watts, Silver 9600LS BT-200DZ |
|
| 6 | ChangBERT Induction Cooktop, Commercial Grade Portable Cooker, Large 8” Heating Coil, Premium Stainless Steel Countertop Burner with NSF Certified, 10 Hours Timer Powerful 1800W Professional Hot Plate |
|
| 7 | Nuwave Pro Chef Induction Cooktop, NSF-Certified, Commercial-Grade, Portable, Powerful 1800W, Large 8” Heating Coil, 94 Temp Settings 100°F - 575°F in 5°F, Shatter-Proof Ceramic Glass Surface |
|
| 8 | ChangBERT Induction Cooktop NSF Certified Professional Chef Edition Stove, 1800W Commercial Induction Burner with Schott Glass, Large Heating Coil Electric Hot Plate for Restaurant Hotel Food Station |
|
| 9 | Duxtop 1800W Portable Induction Cooktop Countertop Burner, Gold 8100MC/BT-180G3 |
|
| 10 | Nuwave Double Pro Cooktop Induction Countertop Burner, Portable, 900/1500/1800W with Dynamic Watt Technology, 50°F to 575°F, 8” Heating Coil, Shatter-Proof Ceramic Glass, Seamless IMD Touch Panel |
|
At its heart, an induction cooktop functions through electromagnetism. Inside the cooktop, copper coils generate a high-frequency alternating current, creating an electromagnetic field. When an induction-compatible pan (made of ferromagnetic material like cast iron or magnetic stainless steel) is placed on the cooktop surface, this field induces eddy currents within the base of the cookware. It is these eddy currents that cause the pan to heat up directly, while the cooktop surface remains relatively cool to the touch. This direct heat transfer method minimizes energy loss and provides instant heat adjustments.
Components of an Induction Cooktop
A typical built-in induction cooktop consists of several key components working in harmony. The main elements include the ceramic glass surface, which is durable and easy to clean, beneath which lie the electromagnetic coils. These coils are connected to a power control unit that regulates the current flow and, consequently, the heat output. A fan system is usually integrated to cool the internal electronics, preventing overheating. Modern cooktops also feature intuitive touch controls, a digital display, and various safety sensors.
Advantages and Disadvantages of Induction Cooktops
Induction cooktops offer significant advantages over traditional gas and electric models, making them a popular choice for contemporary kitchens. They cook foods faster, are more energy-efficient, provide precise temperature control, are easier to clean due to the cool surface, and are generally safer as there’s no open flame or hot coil. However, they do require specific induction-compatible cookware and often entail a higher initial purchase price and potentially an electrical system upgrade during installation.
Types of Induction Cooktops
Induction cooktops come in various configurations to suit different kitchen layouts and cooking preferences. Understanding these types can help you choose the best model for your needs and simplify the installation process.
By Number of Cooking Zones
Induction cooktops are available with different numbers of cooking zones, catering to diverse household sizes and cooking habits.
- Single-zone induction cooktops: Often portable, ideal for small spaces, dorms, or as an auxiliary burner.
- Double-zone induction cooktops: A popular choice for smaller kitchens or apartments, offering two independent cooking areas.
- Multi-zone induction cooktops (3, 4, or 5+ zones): Standard for most family kitchens, providing ample space for preparing multiple dishes simultaneously. Some high-end models feature “flex zones” that can combine into one large cooking area for oversized pots or griddles.
By Design
The design of an induction cooktop primarily dictates its placement and installation method.
- Built-in (or integrated) induction cooktops: These are designed to be permanently installed into a cutout in your kitchen countertop, offering a seamless and flush appearance. They require careful measurement and electrical connection.
- Portable (or countertop) induction cooktops: These are standalone units that simply plug into a standard outlet and can be moved as needed. They are not built into the counter and thus do not require complex installation.
By Features
Modern induction cooktops boast an array of advanced features designed to enhance cooking convenience and safety.
- Inverter technology: Provides consistent power delivery, even at low settings, preventing the on-off cycling common in older models, which can lead to more even cooking.
- Booster function: Temporarily increases power to a cooking zone for rapid boiling or searing, significantly reducing cooking times.
- Automatic cooking modes: Pre-set programs for tasks like melting chocolate, simmering sauces, or keeping food warm.
- Pan detection: Automatically recognizes when compatible cookware is placed on a zone and only activates heating at that point.
- Bridge function: Allows two cooking zones to be combined to accommodate larger cookware like griddles.
Comparing Popular Induction Cooktop Brands
When selecting an induction cooktop, various brands offer different combinations of features, quality, and price points. While specific models change frequently, understanding common comparison points helps in making an informed decision.
| Feature / Brand Aspect | Entry-Level/Mid-Range Brands (e.g., Sunhouse, Kangaroo) | Mid-Range/Premium Brands (e.g., Electrolux, Bosch) | High-End/Luxury Brands (e.g., Wolf, Miele) |
|---|---|---|---|
| Price Range | Affordable | Moderate to High | Premium |
| Build Quality | Standard | Good to Excellent | Exceptional |
| Cooking Zones | Typically 2-4, standard sizes | 3-5, often with flex zones, power boost | 4-6, advanced flex zones, precise control |
| Features | Basic power control, timer | Inverter, booster, auto programs, touch controls | Sophisticated controls, smart features, bridging |
| Energy Efficiency | Good | Very Good | Excellent |
| Warranty | Standard 1-2 years | 2-5 years, often with extended options | 5+ years, comprehensive service |
| Aesthetics | Functional, simple design | Sleek, modern, integrated | Premium materials, designer appeal |
| Noise Level | May have noticeable fan noise | Quieter fan operation | Nearly silent operation |
Guide to Choosing the Right Induction Cooktop
Selecting the perfect induction cooktop involves more than just picking a brand; it requires careful consideration of your lifestyle, kitchen space, and budget. Making the right choice ensures long-term satisfaction and seamless integration into your home.
Determine Your Usage Needs
Begin by assessing your household’s cooking habits.
- Family Size: Larger families or those who entertain frequently may benefit from a cooktop with 4 or more cooking zones, possibly with flexible zones. Smaller households might find a 2-zone model sufficient.
- Cooking Frequency: If you cook daily and prepare elaborate meals, investing in a model with advanced features like inverter technology, booster functions, and precise temperature control will be worthwhile. For occasional cooking, a more basic model might suffice.
- Common Dishes: Consider the types of meals you typically prepare. If you frequently use oversized pots or griddles, look for models with bridge functions or larger element sizes.
Choose Appropriate Size and Style
The dimensions and aesthetic of your cooktop must complement your kitchen.
- Countertop Cutout: This is critical for built-in models. Always measure your existing cutout or the planned space precisely and compare it to the manufacturer’s specified cutout dimensions for the new cooktop. Standard sizes are typically 30 or 36 inches wide, but other sizes are available.
- Overall Dimensions: Ensure the cooktop’s overall size fits the available counter space and that there’s adequate clearance from walls, cabinets, and other appliances.
- Aesthetic: Induction cooktops usually come with sleek, black glass surfaces. Decide if you prefer a model with a stainless steel trim or a trimless design for a truly integrated look.
Consider Power, Features, and Technology
Modern induction cooktops are equipped with a range of features that can enhance your cooking experience.
- Power Output (Wattage): Higher wattage generally means faster heating. Consider if a booster function is important for quick boiling.
- Control Type: Most induction cooktops feature touch controls. Look for intuitive interfaces and clear displays.
- Safety Features: Auto-shutoff, child lock, residual heat indicators, and pan detection are vital safety features to look for.
- Smart Features: Some advanced models offer Wi-Fi connectivity for remote monitoring or integration with smart home systems.
Select a Reputable Brand and Good Warranty
Research brands known for their reliability and customer support. A strong warranty (typically 1-5 years) indicates the manufacturer’s confidence in their product and provides peace of mind. Check local service availability and read user reviews to gauge long-term performance and satisfaction.
How to Install a Built-In Induction Cooktop Yourself
Installing a built-in induction cooktop is a manageable DIY project if you follow the manufacturer’s instructions diligently and prioritize safety. Remember, if you are uncomfortable with electrical work, always consult a licensed electrician.
Required Preparation and Tools
Before beginning, ensure you have all necessary tools and that your kitchen setup meets the installation requirements.
- Tools: Screwdriver (various types), measuring tape, pencil, level, wire cutter/stripper, heat-resistant silicone caulk, jigsaw (for new countertop cutouts), angle grinder or plunge router (for stone/solid surface modifications).
- Materials: New induction cooktop, electrical wires (if needed), circuit breaker (if upgrading), wire nuts, electrical tape.
- Prerequisites: Your kitchen’s electrical system must meet the cooktop’s load requirements, typically a dedicated 240-volt circuit with a 30- to 50-amp breaker. Ensure compliance with local electrical codes. If replacing a gas cooktop, have a professional plumber cap the gas line.
Step-by-Step Installation Guide
Follow these steps carefully to ensure a safe and effective installation:
-
Turn Off Power: Crucially, before touching any wiring or components, go to your main electrical panel and turn off the circuit breaker that supplies power to the kitchen area where you’ll be working. Tag the breaker to prevent accidental re-energizing. This is essential for preventing electric shock.
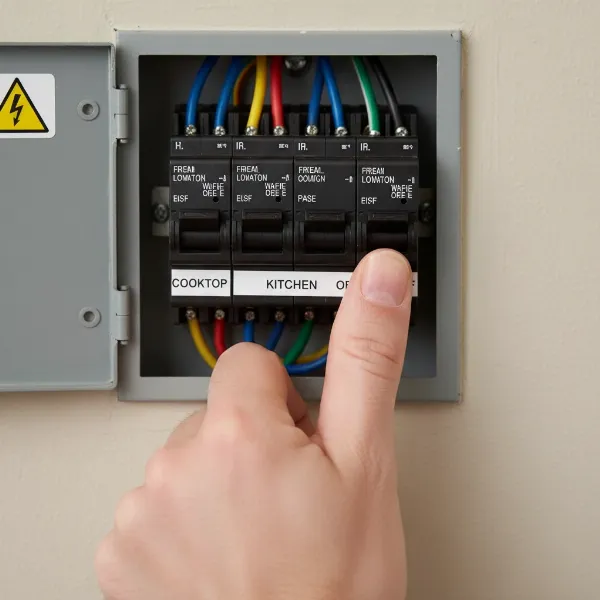 A hand flipping a circuit breaker to the "off" position for kitchen power installation, emphasizing safety.
 -
Remove the Old Cooktop (If Applicable): If you’re replacing an existing cooktop, use a screwdriver to detach any mounting screws or clips holding it in place. Gently lift the old cooktop out of the countertop cutout. Disconnect the electrical wires, noting how they were connected, and safely cap any disconnected wires if they are live.
-
Measure and Prepare the Countertop Cutout:
- Verify Dimensions: Consult your new induction cooktop’s installation manual for the exact cutout dimensions (width, depth, and corner radius).
- Existing Cutout: If replacing, compare the existing cutout to the new cooktop’s requirements. If it’s too small, you’ll need to carefully enlarge it. If it’s slightly too large, some manufacturers offer trim kits to cover gaps.
- New Cutout: If installing in a new countertop, carefully mark the dimensions on the counter surface. Use a jigsaw for laminate countertops. For stone or solid-surface materials, it’s often best to consult a professional or use specialized tools like an angle grinder with a diamond wheel for minor enlargements, or a plunge router for solid surfacing, ensuring rounded corners.
- Clearances: Ensure there’s adequate clearance below the cooktop (e.g., 3 inches minimum to combustible materials) and from adjacent walls or cabinets as specified by the manufacturer.
-
Prepare Electrical Connections:
- Dedicated Circuit: An induction cooktop requires a dedicated, grounded 240-volt circuit with a 30- to 50-amp breaker, depending on the model.
- Junction Box: The circuit should terminate in an approved junction box mounted below the counter, typically about 16 inches below the underside of the countertop to prevent excessive heat exposure.
- Wiring: Most cooktops come with a flexible armored cable. You’ll need to connect this to your home’s wiring in the junction box. Follow the manufacturer’s wiring diagram precisely. Generally, this involves connecting black to black, red to red (for 240V), and the green or bare copper wire to the ground wire. Use appropriately sized wire nuts and secure connections firmly, wrapping with electrical tape for extra security. If you are unsure about wiring, or if your home requires a new circuit or switchboard upgrade, always hire a licensed electrician.
-
Install the Cooktop:
- Placement: Carefully lower the induction cooktop into the prepared cutout, ensuring it sits flush and is properly aligned. Use a level to confirm it rests evenly.
- Secure the Unit: Follow the manufacturer’s instructions for securing the cooktop. This typically involves brackets, clamps, or screws that fasten the unit to the underside of the countertop. Ensure it is firmly in place to prevent movement during use.
- Seal Gaps: Apply a thin, even line of heat-resistant silicone caulk around the perimeter of the cooktop where it meets the countertop. This creates a seal, preventing debris and liquids from seeping underneath and protecting the cabinetry.
-
Test Your Installation:
- Once everything is secured and sealed, turn the power back on at the circuit breaker.
- Place an induction-compatible pan (a magnet should stick to its bottom) on each cooking zone.
- Turn on each zone to ensure it heats up correctly and that all controls function as expected. Check for any error codes.
How to Use and Maintain Your Induction Cooktop
Proper usage and regular maintenance are key to maximizing the lifespan and performance of your built-in induction cooktop.
Operating Functions
Induction cooktops are generally intuitive to use.
- Power Levels: Adjust heat using touch controls, typically ranging from 1 (low) to 9 or 10 (high), often with booster options for quick heating.
- Timers: Utilize built-in timers for precise cooking duration, often with automatic shut-off features.
- Pan Detection: Cooktops will only activate when induction-compatible cookware is placed on a zone, often displaying an error if the wrong type of pan is used or if no pan is present.
- Safety Lock: Engage the child lock feature to prevent accidental operation, especially important in households with children.
Cleaning and Maintenance
The smooth glass surface of induction cooktops makes them remarkably easy to clean.
- Daily Cleaning: Wipe down the surface with a damp cloth and mild dish soap after each use to remove food spills.
- Stubborn Stains: For tougher stains or burnt-on residue, use a specialized ceramic or induction cooktop cleaner and a non-abrasive scrubber. Avoid harsh chemicals or abrasive pads that can scratch the glass.
- Ventilation: Ensure the cooktop’s cooling fan inlets and outlets (usually located underneath or around the perimeter) are clear of obstructions for proper air circulation.
Safety Precautions
While safer than gas or traditional electric cooktops, certain precautions are necessary.
- Correct Cookware: Always use induction-compatible cookware. Incompatible pans will not heat and may cause error messages.
- Avoid Overheating: Do not leave an empty pan on a hot burner, as this can damage the cooktop or the pan.
- Clearances: Ensure adequate space around and below the cooktop for ventilation to prevent overheating of the internal electronics.
- Professional Electrical Check: Regularly have a licensed electrician inspect your electrical connections, especially if you notice any flickering lights or unusual smells.
- Children and Pets: Keep children and pets away from the cooktop, especially when in use, even though the surface remains cooler than other cooktop types.
Troubleshooting Common Induction Cooktop Problems
Even with careful installation, you might encounter minor issues. Here’s how to address some common problems:
Cooktop Not Heating
If your induction cooktop isn’t heating, consider these steps:
- Power Supply: Double-check that the circuit breaker for the cooktop is in the “on” position.
- Electrical Connections: Re-verify that all electrical connections are secure and correctly wired according to the manufacturer’s diagram. If you suspect an issue here, call a licensed electrician.
- Cookware Compatibility: Ensure your cookware is induction-compatible. A simple magnet test can confirm this—if a magnet sticks firmly to the bottom of the pan, it’s compatible.
- Pan Placement: Ensure the pan is centered on the cooking zone and fully covering the element.
Error Codes
Modern induction cooktops often display error codes to indicate a specific problem.
- Consult Manual: The first step is always to consult your cooktop’s user manual. It contains a comprehensive list of error codes and their corresponding solutions.
- Common Errors: Errors might relate to incompatible cookware, insufficient ventilation, internal overheating, or electrical issues. Solutions often involve repositioning the pan, ensuring proper clearances, or resetting the power.
Cracked Glass Surface
A cracked glass surface is a serious issue that often requires professional repair or replacement.
- Immediate Action: If the glass surface cracks, immediately turn off the cooktop and cut power at the circuit breaker to prevent any electrical hazards.
- Causes: Cracks can result from sudden impacts (dropping heavy items), extreme temperature changes, or manufacturing defects.
- Professional Service: Do not attempt to use a cooktop with a cracked surface. Contact the manufacturer’s service department or a qualified appliance technician for assessment and repair.
Induction Cooktop vs. Infrared Cooktop: A Comparison
While both induction and infrared (radiant electric) cooktops offer sleek, flameless cooking, they operate on fundamentally different principles.
| Feature | Induction Cooktop | Infrared (Radiant Electric) Cooktop |
|---|---|---|
| Heating Method | Electromagnetic fields heat cookware directly | Heating elements underneath glass heat the surface, then cookware |
| Heat Transfer | Direct to pan | Indirect (cooktop surface to pan) |
| Efficiency | Highly efficient (up to 90%), minimal heat loss | Less efficient (around 70%), more heat loss to kitchen |
| Speed | Very fast heating and instant temperature changes | Slower heating, takes time for elements to cool/heat |
| Surface Heat | Cooktop surface remains relatively cool, only heated by residual pan heat | Cooktop surface gets very hot during operation |
| Safety | Safer due to cooler surface, auto pan detection | Hot surface poses burn risk, residual heat warning lights |
| Cookware | Requires ferromagnetic (magnetic) cookware | Compatible with all types of flat-bottomed cookware |
| Cleaning | Easy to clean, spills don’t burn onto cool surface | Spills can burn onto hot surface, harder to clean |
| Energy Usage | Lower energy consumption over time | Higher energy consumption compared to induction |
| Cost | Generally higher initial purchase price | Generally lower initial purchase price |
Frequently Asked Questions About Induction Cooktops
Can I install an induction cooktop on my own?
While it is possible to install an induction cooktop yourself, especially if replacing a similar unit, professional installation is highly recommended, particularly for the electrical connections, to ensure safety and compliance with local codes.
What kind of electrical wiring does an induction cooktop need?
Most residential induction cooktops require a dedicated, grounded 240-volt circuit with a 30- to 50-amp circuit breaker. The exact amperage depends on the cooktop’s wattage, so always consult the manufacturer’s specifications.
What if my countertop cutout is not the right size?
If your existing cutout is too small, it may need to be carefully enlarged. If it’s slightly too large, some manufacturers offer trim kits to cover gaps. If the cutout is significantly off, you might need to modify your countertop or choose a different cooktop model.
Is it necessary to have special cookware for induction cooktops?
Yes, induction cooktops require cookware with a magnetic base, such as cast iron or magnetic stainless steel. Non-magnetic materials like aluminum, copper, or glass will not work unless they have an integrated magnetic layer.
Are induction cooktops more energy-efficient than gas or electric?
Absolutely. Induction cooktops are highly energy-efficient, converting up to 90% of electrical energy directly into heat for the cookware. This significantly outperforms gas and traditional electric cooktops, leading to faster cooking and lower energy bills.
How do I clean my induction cooktop without scratching it?
To clean your induction cooktop, use a soft cloth or sponge with mild dish soap or a specialized ceramic cooktop cleaner. Avoid abrasive scrubbers, harsh chemicals, or steel wool, which can scratch the glass surface.
Where to Buy a Reliable Induction Cooktop?
When purchasing an induction cooktop, reliability and good customer service are paramount. You can find a wide selection at:
- Major Appliance Retailers: Stores like Best Buy, Lowe’s, or The Home Depot often carry a broad range of brands and models, offering competitive pricing and sometimes installation services.
- Specialty Appliance Stores: These stores typically have knowledgeable staff who can provide expert advice and may offer higher-end or niche brands.
- Online Marketplaces: Websites like Amazon, Wayfair, or the manufacturers’ direct sites (e.g., Bosch, Electrolux, Samsung) offer convenience and a vast selection, but be sure to check return policies and warranty information.
- Local Electricians/Kitchen Designers: Often, professionals who assist with installations or kitchen renovations can recommend reputable suppliers or even procure the appliance for you.
Ultimately, installing a built-in induction cooktop yourself is a rewarding endeavor that can modernize your kitchen and enhance your cooking experience. By understanding the technology, diligently preparing your workspace, carefully following installation steps, and adhering to safety protocols, you can confidently undertake this project. Remember to prioritize electrical safety and consult a professional electrician if any part of the wiring seems beyond your comfort or expertise. With your new induction cooktop in place, you’ll be ready to enjoy faster, more efficient, and safer cooking for years to come.
What culinary adventures will you embark on with your newly installed Induction Cooktop?